Adding the switcher to a menu
- Go to Appearance → Menus and select the menu you want (usually your main or header menu).
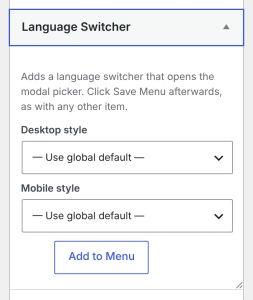
- On the left, find the Language Switcher box. If you do not see it, open Screen Options at the top right and tick Language Switcher.
- Optional: pick a Desktop style and a Mobile style for this item. Leave them on Use global default to follow the Trigger tab.
- Click Add to Menu. The item appears at the bottom of the menu.
- Drag it where you want it, then click Save Menu.
On your site, the menu item becomes the switcher button. Clicking it opens the language window.
Changing the style later. Open the menu item in the menu editor. Under it you will see Desktop Style and Mobile Style. Pick a style, then click Save Menu. These override the Trigger tab for this item only.
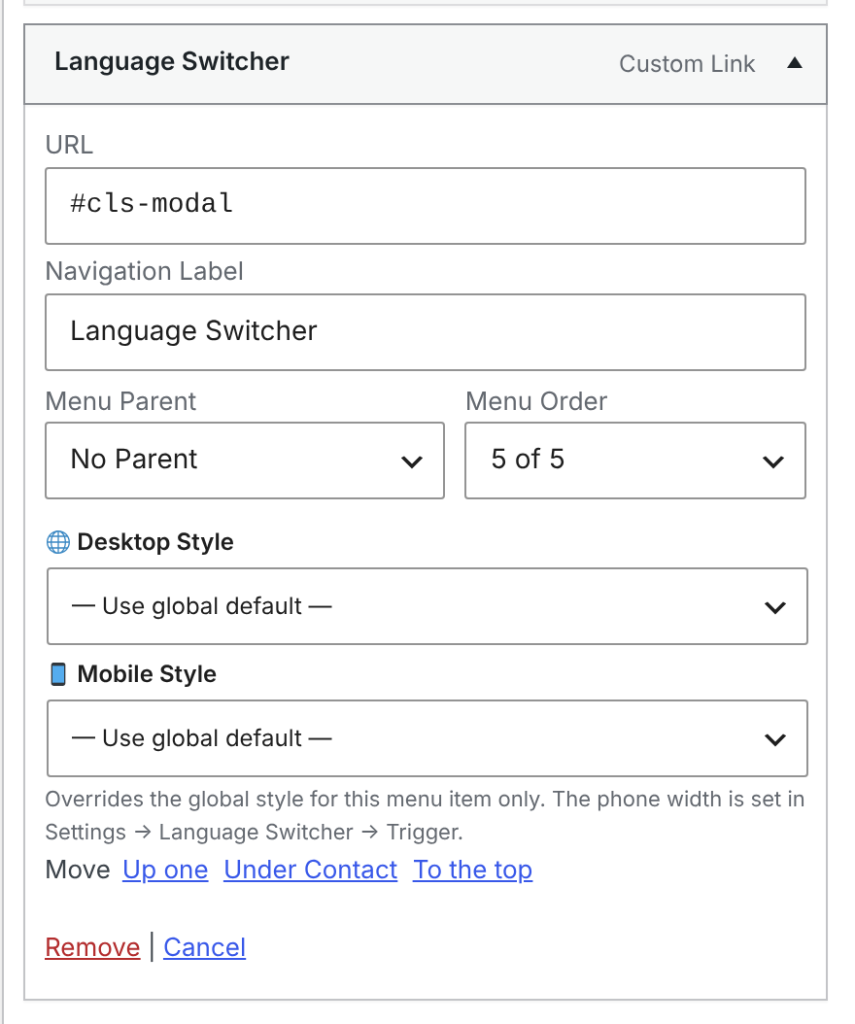
Another way: a custom link. Add a Custom Link with the URL #cls-modal and any text. It is replaced with the switcher button in the same way. This is handy in places that only accept links.
Note
The mobile style is used on screens up to the width set in Trigger → Use the phone style up to (768 pixels by default).