Quick start: your first switcher in 5 minutes
Step 1. Open the settings. Go to Settings → Language Switcher. You land on the Languages tab.
Step 2. Tick your languages. Tick every language your site is available in. If you use a translation plugin, tick the same languages you set up there. Use the search box to find a language by its English name, its own name or its code.
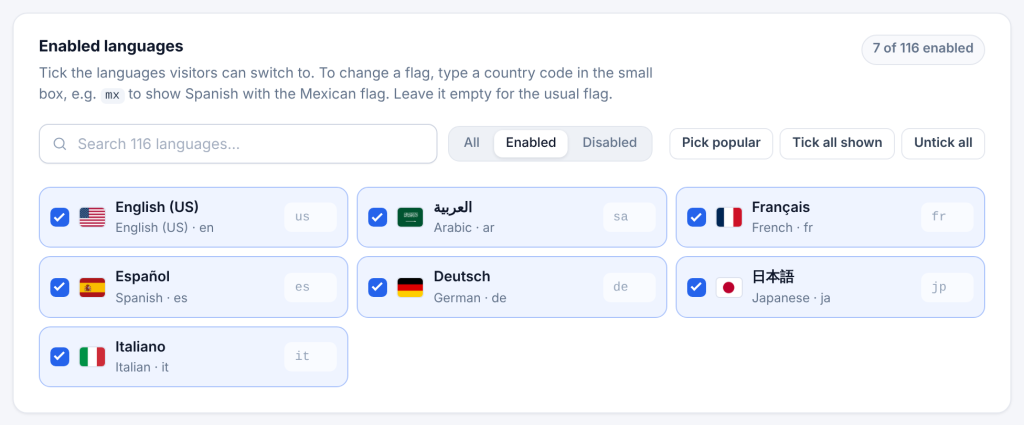
Step 3. Choose the default language. In the Default language card, pick the main language of your site. If you use a translation plugin, pick the same default language as in that plugin.
Step 4. Save. Click Save changes at the top right (or press Ctrl+S, Cmd+S on a Mac). A message in the corner confirms the save. The page does not reload.
Step 5. Add the button to your menu. Go to Appearance → Menus, find the Language Switcher box on the left, click Add to Menu, then click Save Menu. Using a block theme? Add the Language Switcher Trigger block to your header instead (see Adding the Switcher).
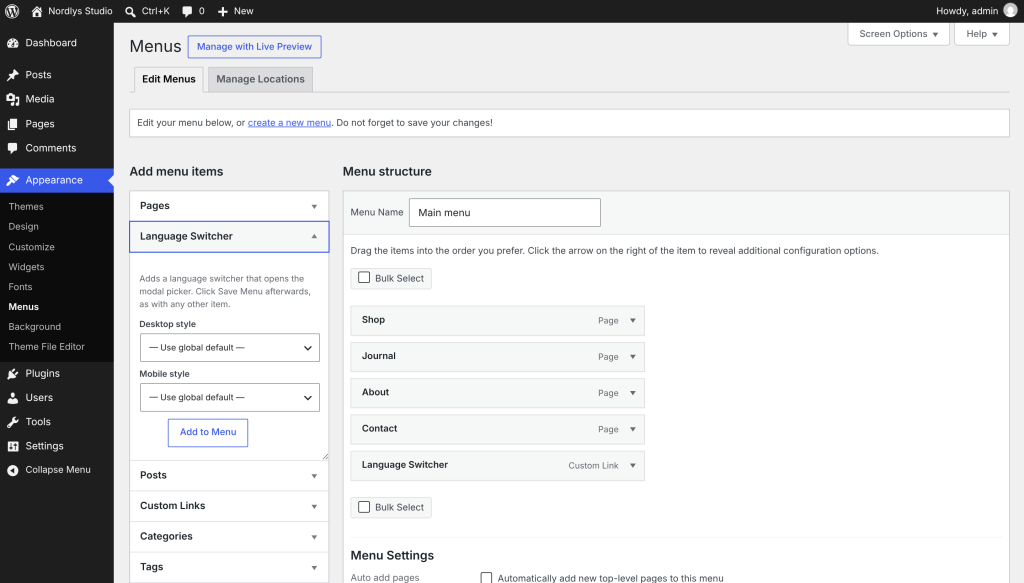
Step 6. Check your site. Open your site in a new tab and click the button. The language window opens with your languages.
That is all you need. Everything else (button style, colors, country suggestions, analytics) is optional and covered in the rest of the docs.
The Languages tab shows four summary tiles at the top: how many languages are on, where your URLs come from, and whether country and browser detection are on. It is a quick health check.